
Preface: I wrote this series of articles to show how to get excellent results in body work with simple tools. It's intended to be a guide for the novice body worker trying to save money, and covers only surface preparation prior to painting. Not everybody can afford the big air compressor and special tools associated with this kind of work for what may be a one time job. I'm into my third full restoration and sixth paint job, and still prefer to keep it simple. I hope this little piece will help someone because any day I can help someone is a good day for both of us. Click here to see all articles in this series
- John D. Weimer
Applying Undercoating
(actually, just a vignette, but still important)
I don't know of a new car dealership that undercoats anymore. It's done mostly by car owners with aerosol products. I have always preferred, used, and have had excellent results by brushing on plastic roof sealing compound. The word plastic has nothing to do with the composition of these products, it just means the form of it can be changed during application. In other words, it's spread-able. It is also quite messy and difficult to work into tight corners.
The first time I used this was on my new 1962 Studebaker Hawk, which is sitting on my carport, and none of it has ever cracked, chipped off, or failed in any way. Aerosol undercoats are fine and there are a lot of excellent ones on the market. However, even at the thinnest you can smear roof sealing compound on, you'll have three times the protection you can get with an aerosol product. It is unsurpassed in rock chip protection, sound deadening, and corrosion defense. When fully cured in 4 to 6 months, it can be painted.
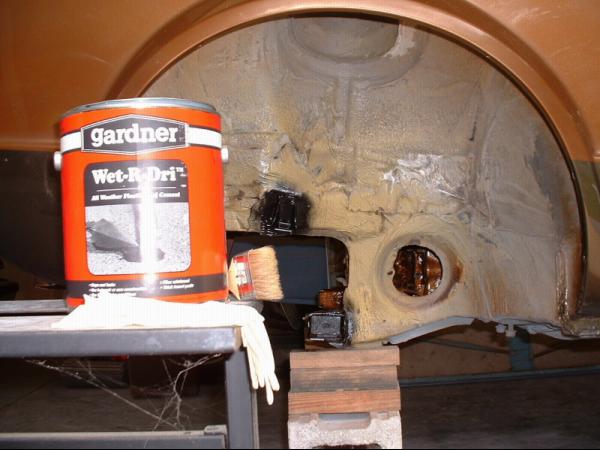
As you can see this fender well is very rough. This is a result of the factory "gomming" on rubberized body sealing compound with a course brush. Some areas were so rough I used a body grinder to remove some of the compound and smooth things up a bit. Some thinner areas had dried out and were getting loose so I removed what had failed and sealed the fender wells with Penetrol. Penetrol is an additive and primer for oil based house paints that I have found to be an excellent rust proofing for cars.
You'll need a cheap 2" paint or chip brush, rubber gloves, and a willingness to make a hell of a mess. Be prepared to trash the brush, a few pair of gloves if they are thin latex, the clothing you wear, and maybe a little of your hair. What can I say? You just dive in and smear the sealer around until you get full coverage. Start in the hardest to reach areas and work in to the easy part, go the other way and you'll end up with more sealer on you than in the fender well.

I finished up this job by checking it out with a flashlight and spraying missed spots in tight places with aerosol undercoat to insure a positive seal everywhere. The last step was to dip the tip of the brush in mineral spirits paint thinner and lightly stroke the visible surfaces to smooth them out.
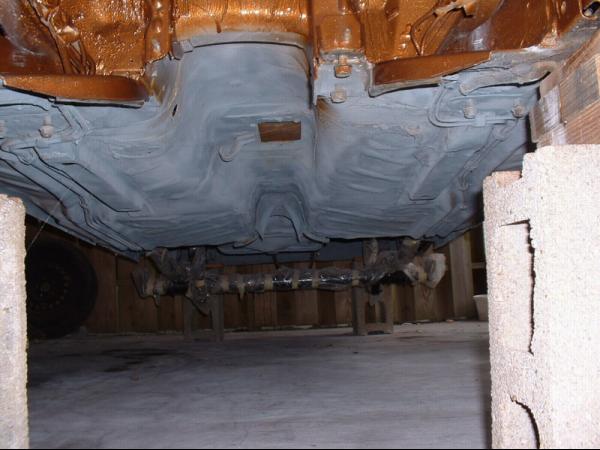
The fender wells weren't the only thing that got undercoated. The first thing I did after stripping everything off the truck was to scrub and pressure wash the entire bottom. This was followed by some minor corrosion repairs, sealing with Penetrol, and applying a coat of truck bed liner.
Final Words
Overkill? Maybe. I'm just picky that way.
But, here's the finished product; you decide.
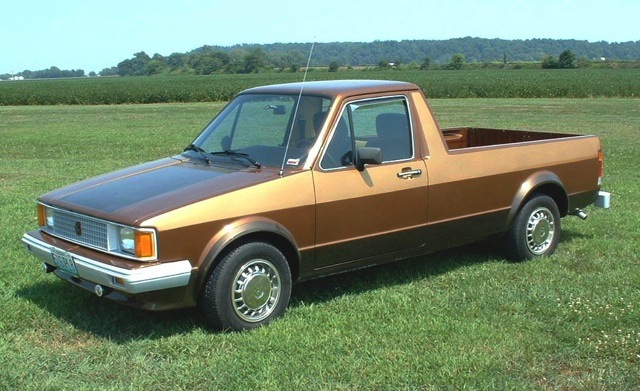
JETTUP - JDW's Volkswagen turbo diesel 5-speed pickup with the heart of a Jetta

")


talking with a mechanic about this today...
need ideas
regular practice to make it perfect biro
jodoh
Want to leave a comment or ask the owner a question?
Sign in or register a new account — it's free